(This feature has recently been updated. Please click here to see a description of the new features.)
There are two main reasons to attach documents to referrals: (1) The specialist needs clinical information to help them understand your patient's medical requirements, and (2) To provide detailed insurance information (such as copies of membership cards or prior letters regarding authorizations).
There are three different ways to attach records to referrals. From the "View Referral: Attach Records" page, select the type of document you wish to add, and click
 to add a document. to add a document.
No matter what method you use to attach documents, it is a good idea to add as much specific, distinguishing information for the title, "source" and date as possible. This will aid you when you wish to re-use documents later.
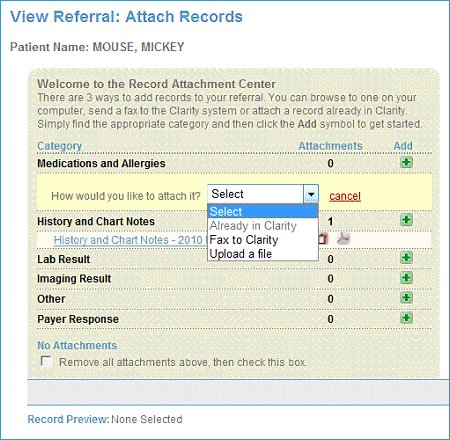
Chart notes have already been attached to this referral for Patient "Mouse, Mickey". The user has selected the Add button for Medications and Allergies and is ready to choose a method for adding the next document.
A section opens under the Category you chose. The drop down menu gives you three choices for adding documents to this referral:Already in ClarityIf you have already loaded the document (say, for an earlier referral), you may re-use that document by selecting this option. You will be presented with a list of existing documents from which you may select one or more to attach to this referral.
Fax to ClarityTo fax in paper charts, select "Fax to Clarity". The page that appears allows you to enter descriptive information about the document you plan to fax. Then, click  . A window with the cover sheet will pop up along with the print dialog. . A window with the cover sheet will pop up along with the print dialog.
Print this cover page. Send it in front of the document you are sending in. DO NOT RE-USE COVER PAGES FOR OTHER DOCUMENTS! Each cover page is coded specifically for the document you are sending in. You may send multiple documents in one fax transmission. Make sure the cover page immediately precedes the document. The order of the pages in your fax must be Cover Page #1, Document #1, Cover page #2, Document #2, etc.
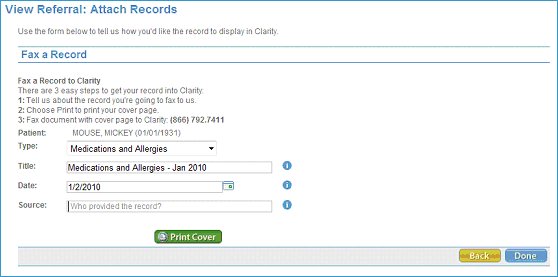
For faxing documents to accompany a referral.
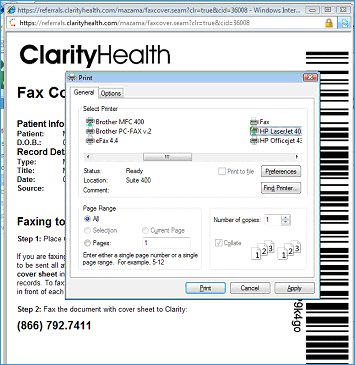
The fax cover page and print dialog. If a barcode does not display, refer to the Troubleshooting section.Upload a FileIf you have files stored electronically, and they are accessible to you as a PDF file, text file, Word document, JPEG (.JPG) or Tiff (.TIF) image file, you may upload them directly to Clarity.
This selection also allows you to convert text directly to PDF documents for your referrals. This is handy if you can "Copy and Paste" from your EMR or practice management system.
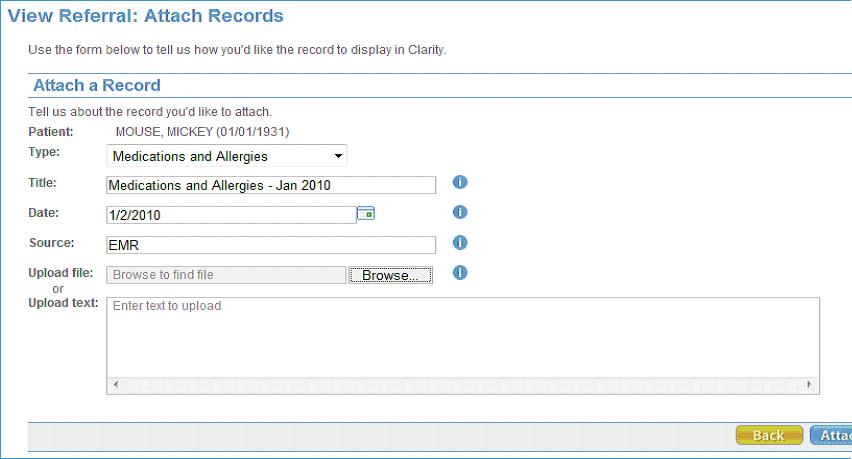
Dialog to attach electronic documents.
If you have a file to upload, select the "Browse" button next to the "Upload file:" field. A standard browse file dialog opens. Find the file and click "Open." The file name and path will be placed in the "Upload file:" field.
If you have copied text from a file or your EMR, paste it in the box labeled "Upload text:". You may also type notes into this field. Clarity will create a document with this text, and will include a header on it that includes the patient's name and DOB, as well as the referring provider's name and practice.
Click the blue "Attach" button to complete the file upload.
|
 We want your feedback:
Send us a note
or give us a call at 877.392.8802 or 206.602.1900
We want your feedback:
Send us a note
or give us a call at 877.392.8802 or 206.602.1900
 Privacy and Security Policy|Terms of Use